Creating A Fluffy Cloud Bed in 3D Studio MAX with Chi Luan Nguyen
Chi Luan Nguyen is a VFX artist based in Ho Chi Minh city, Vietnam.
This fluffy cloud bed has been done during his free time, using 3Ds Max, FumeFX, and V-Ray was used for rendering.
Here’s something about it.
I. References and Challenges
He started with searching around on Google and Pinterest for references. This is one of the most interesting images He’ve seen so far.
 |
| Image reference for overall look |
The most difficult in such a scene like this is amount of cloud clusters and their individual behaviors. Every cloud had been created in different climate conditions. Some cloud is denser, but another is softer. Some is in bold shape but another seems being dispersed under wind. They’re all vary in size, shape, density,...
II. Cloud shapes creation
Creating every cloud shape may takes some time, but a few of them then scatter randomly is way faster, and more productive.
Cloud base shapes are created very quickly with simple modifiers in 3Ds Max. Since there’s no perfection in nature, our shapes can be created randomly without taking care too much about its form. We’ll generate smoke on them anyway.
 |
Basic shapes are created randomly |
III. FumeFX Simulation
As reference image above, each cloud has different form and look. A large amount of various clouds form into an overall scene. Of course we're trying to achieve that look but Chi Luan Nguyen won’t simulate every cluster. He sim them at once!
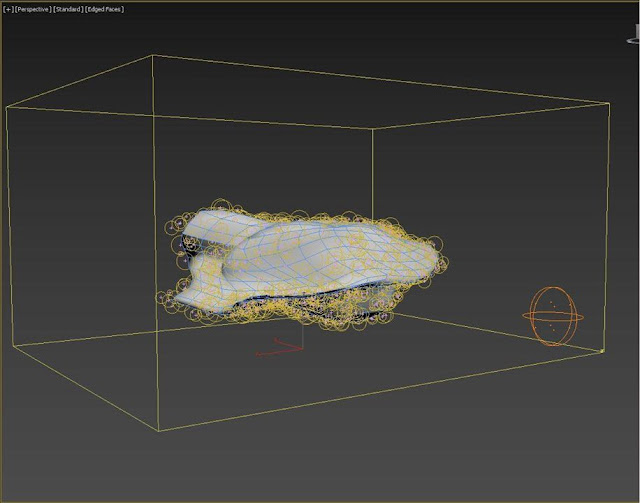
 |
| Particles spawned onto cloud shape for particle based smoke sim |
 |
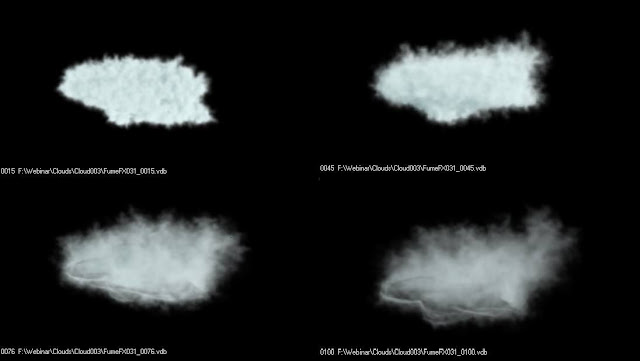
| FumeFX simulation for each cloud shape |
Here’s the cloud shape in viewport:
Chi Luan Nguyen have defined Particle Age in PFlow with largely randomness, my cloud sim has higher density at the beginning and much softer in the second half of sequence. And because he just need one frame for each cloud, so that means, for each FumeFX Domain which is simulated from frame 0 to 100, He have up to 100 clouds slightly different from each other.
 |
| With just one FumeFX Domain, we can have a lot of clouds by loading different frames |
The next step is scatter clouds to camera view. There will be a huge amount of clouds, so it’s impossible to place them by hand. Then, Maxscript and PFlow are great day savers.
With a simple PFlow setup, He scattered 3 base cloud geometries have been created from the start to scene, varying their Scale, Rotation, Position. By this way, He have his scene roughly layout and define transform matrix for my real clouds later on.
 |
| Base cloud shapes are scattered to several planes for layout the scene |
Before placing real clouds, He transfer those particles data to Point Helpers. The reason for that is Helpers are easy to control, such as moving, rotating, or seeing in poor viewport of 3Ds Max.
Here is step-by-step instruction for the first Particle Source. For those whose aren’t familiar with scripting, this part could be a little bit struggle, but just following slowly, it’s should fine.
1. Create a Point Helper.
2. Name it base on PF source. This is important because 3Ds Max will read it. His is “Cloud_001_Marker_001”. You can use any name but it must be easy to recognize.
3. Clone it to the same number of particle number. In this case, mine first PF source has 500 particles, so He cloned more 499 helpers. At this point, he have Cloud_001_Marker_001, Cloud_001_Marker_002, Cloud_001_Marker_003,... so on.
4. Select Particle Source, check on Final Script Update option, then press Edit button.
5. An Event Handler Window will appear. Just delete everything and paste this script to it:
pf_node_current = particleFlow.scriptRunner()if (pf_node_current != undefined) then ( count = pf_node_current.NumParticles() Cloud001_Marker_Arr = $Cloud_001_Marker* as array Cloud001_Marker_Arr.pos = [0,0,-1000000] minCount = amin #(count,Cloud001_Marker_Arr.count) for i in 1 to count do ( pf_node_current.particleIndex = i Cloud001_Marker_Arr[i].transform = pf_node_current.particleTM ))
6. Close the window and go to one frame so that PFlow can update the script.
Here’s the result: |
| Each Point Helpers has exact transform data from corresponding particle ID |
count = pf_node_current.NumParticles() Collect all particle exist in system
Cloud001_Marker_Arr = $Cloud_001_Marker* as array Collect all Helpers we have created above to a group called Cloud001_Marker_Arr. This line will collect all objects that have their name begin with “Cloud_001_Marker”. That’s why I say naming is very important.
for i in 1 to count do ( pf_node_current.particleIndex = i Cloud001_Marker_Arr[i].transform = pf_node_current.particleTM )Those line will assign transform data from particle ID 1 to Cloud_001_Marker_001, particle ID 2 to Cloud_001_Marker_002,... so on. After the script being called, all helpers have exactly Position, Rotation and Scale value from particles.
Repeat these steps for the other two PF Sources, He have total 1.500 helpers for 1,500 particles. That’s really big amount.
VI. Loading .VBD cache using V-RayVolumeGrid
Cloud rendering could lead to several issues, for example, shadow casting and illumination. With V-RayVolumeGrid, we can load and use .VDB sequence cached from FumeFX then render in V-Ray for better result and control. |
| Render test V-RayVolumeGrid |
Just create 3 V-RayVolumeGrid objects and load .VDB cache from 3 FumeFX Domains. Loading mode is Cache Index and choose any frame. This is just for rendering test. Assign Smoke Color and adjust Smoke Opacity at your own taste.
Remember check option “Only if selected” in Preview panel. This is very important to keep your scene from crash later on.
VII. Clouds distribution and randomizing.
Again, MaxScript will be used because there’re 1,500 clouds at all.First of all, he have 3 groups of 500 helpers defined by 3 PF Sources. His method is using first 500 helpers groups to distribute 500 V-RayVolumeGrid objects that load data from FumeFX Domain 01. The next 500 is for FumeFX Domain 02 and the last 500 is for FumeFX Domain 03. Very simple!
From the last step, we have 3 V-RayVolumeGrid objects represent 3 FumeFX Domains. Let’s start with the first one.
Select the first V-RayVolumeGrid, rename it to relative helpers group. His is “VrGrid_Cloud001_001” but you can name it whatever you want. Just make sure MaxScript can identify and sort it by name in calling.
Clone up to 499 objects because there are 500 helpers.
Urgen: DO NOT SELECT ALL OF THEM!!! Because “only if selected” preview mode is turned on, our scene is still fine despite there are 500 volumetric objects. When not selected, they’re just a bounding box. Very light!
You don’t need to select them and align to helpers. MaxScript will handle that very quickly and even more.
Open Script Editor (Scripting Tab > New Script), paste this in blank page:
VrG01 = $VrGrid_Cloud001* as arrayCloud001_Marker_Arr = $Cloud_001_Marker* as array
for i = 1 to VrG01.count do( VrG01[i].transform = Cloud001_Marker_Arr[i].transform VrG01[i].t2f = random 15 100 VrG01[i].smoketransp = random 0.001 0.02)
Press Ctrl+E to evaluate the script. When the script is execute, MaxScript collects all V-VrayVolumeGrid objects that have name begin with “VrGrid_Cloud001* to a group called VrG01, and collects all helpers have name begin with “Cloud001_Marker” to a group call Cloud001_Marker_Arr.
Then, each member of VrG01 group will have exactly transformation data from corresponding helper in Cloud001_Marker_Arr group. You can see the method is using particle system to define transform matrix (position, rotation, scale) of helpers, then pass these data to a set of V-RayVolumeGrid.
Next two lines are telling each member in VrG01 group load a random .VDB cache file in range from frame 15 to 100, and have a random Smoke Opacity from 0.001 to 0.02.
Repeat this again for the rest 1,000 helpers and don’t forget how important naming roles.
This is raw render of 1,500 clouds: |
| Render of 1,500 V-RayVolumeGrid objects |
 |
| ... and Final |


Comments
Post a Comment